draw minecraft objects 3d planner
Introduction
binvox and viewvox can be of aid when trying to build a voxelized version of a 3D mesh in minecraft.Executables are available for Linux (32 and 64 fleck), Mac Bone X, and Windows.
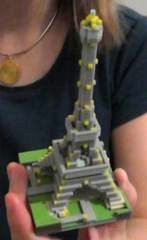
Do send me screenshots of the models you take congenital!
Click on the image on the right to see the gallery in the picasa web album binvox/viewvox for minecraft.
Note to Windows users:
binvoxand
viewvoxare commandline tools, which means they must be run from a command vanquish. In Windows, get-go a command beat with Start → Run → cmd (enter), and so apply the
cdcontrol to change to the folder where you accept
binvox.exe,
viewvox.exe, and the model you want to convert. Send me a annotation if anything is unclear. Eric Haines wrote a good
footstep-by-step tutorial for Windows users, and has created a quickstart package of all software needed for Windows (including two sample models). Here is a tutorial in High german (Tutorial auf Deutsch).
(I've had ane report from a Windows user where the downloaded binvox and viewvox files had to be renamed to binvox.exe and viewvox.exe)
Note to Mac users: the same goes for the Mac, you should run
binvoxand
viewvoxfrom the Terminal: after downloading them into the same folder as your model, do:
- chmod 755 binvox
- chmod 755 viewvox
- You can then run the programs like this:
./binvox
and:
./viewvox
to go a summary of the commandline options.
Here is a Mac tutorial, written by Manic Miner. If you accept questions about how to use the Concluding app, please search Google for "mac os 10 using last".
Note to Linux users: I assume you're familiar with the commandline :-) (but do send me a note if something is unclear)
Process
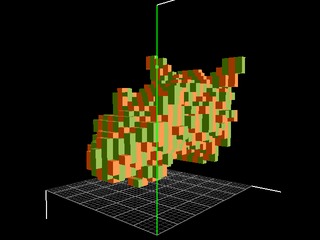
Assume we have a 3D model like the one at the top left, in a file mug.wrl.Pace ane: voxelize it
Run:./binvox -d 32 -c mug.wrl
which will create a file mug.binvox.
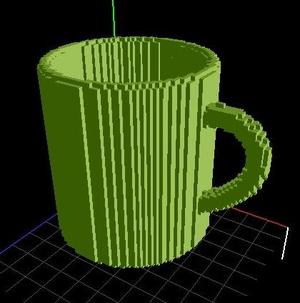
View the result with viewvox:
./viewvox mug.binvox
(the ten, y, and z in the image were added afterwards):
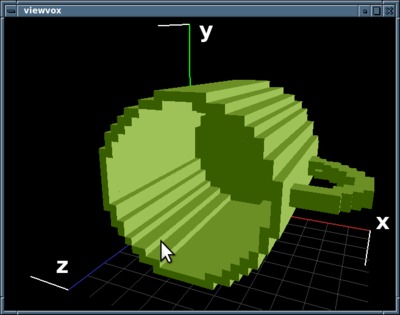
In viewvox, the x axis is red, the y axis green, and the z axis blueish. Some models (like this one) utilize the z centrality as the up centrality, whereas viewvox uses the y axis. You can fix this by passing -rotx parameter to binvox, which makes information technology rotate the object past 90 degrees counter-clockwise around the x centrality, effectively changing the up axis from z to y:
./binvox -d 64 -c -rotx mug.wrl
How to voxelize thin features
If your model has no thin features, you lot can skip this section.
If the model has thin features that are lost in the voxelization, you may want to voxelize at a higher resolution and downsample:
./binvox -d 256 -downward -downwardly -c mug.wrl
You may too want to play with the -dmin parameter, which sets the minimum number of source voxels that take to be on in the 2x2x2 source cube for a destination voxel to exist on. It defaults to four, merely for very thin features yous could endeavor 2, for example:
./binvox -d 256 -downward -down -dmin 2 -c mug.wrl
If the model has features with zero width (e.thousand. a single triangle/quad/etc.), you could use both the -aw option ("add together wireframe"), which likewise renders the model in wireframe (only when carving), which does render naught width triangles seen from the side, and -dc ("dilated etching"), which doesn't cleave away as much (the carving stops one voxel before the intersection), for example:
./binvox -d 256 -down -downwardly -c -dc -aw mug.wrl
How to voxelize only part of the model
Suppose you accept a model of a gargoyle, and you desire to voxelize just the head:
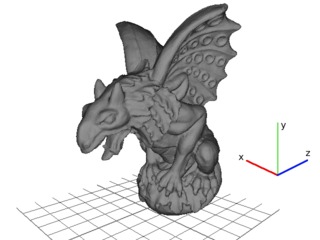
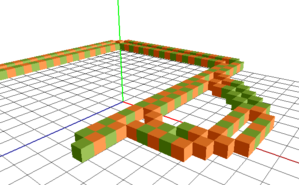
You can see from the axes in the paradigm that this means we need to limit the voxelization in the z management. You tin crop the rendering of binvox with the -bb parameter, noting that your model will always be in the unit cube (i.eastward. the cube from (0, 0, 0) to (i, 1, 1)). Examine the whole voxel model (voxelized with binvox -d 64 -cb) to estimate approximately where you lot demand to crop:
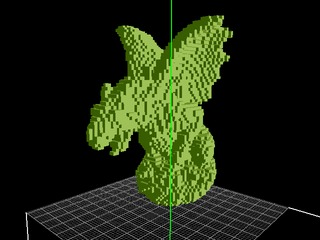

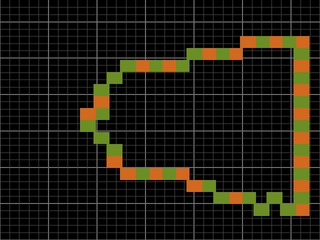
The bottom image shows the voxel model from the top (press y in viewvox to become the view straight from the top, and possibly p to switch to an orthographic projection). Yous can see the head ends approximately 25 voxels from the left. 25/64 is virtually 0.4, to we'll limit voxelization to 0.iv in the z direction:
binvox -d 64 -cb -bb 0 0 0 i 1 0.4 -fit gargoyle.ply
(-cb centers the model in the unit cube, -fit makes sure a voxel model is written with just the voxels in its bounding box). The result:
Annotation: because the verbal voxelization method (select with -e) doesn't apply OpenGL, the -bb parameter has no event. Also, y'all may have to experiment with using the voting method simply (select with -v) for example, because cropping a model is probable to make it hollow.
Step two: visualize slice by slice
Run:./viewvox mug.binvox
By default viewvox removes the internal voxels (creating a "hollow" model). If y'all want to keep the internal voxels, run it similar this: ./viewvox -ki mug.binvox.
The keyboard and mouse commands available in viewvox are printed in the terminal window you run it from ("cmd" in Windows, "Last" in Mac Bone 10).
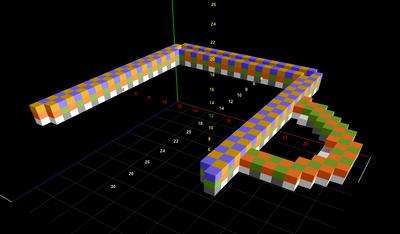
Now, typically you lot'd press s to prove one piece of the voxel model, thou and j to show the next piece up and downwardly (the current slice index is shown in the terminal window), and a to show the voxels with alternate colours, for instance:
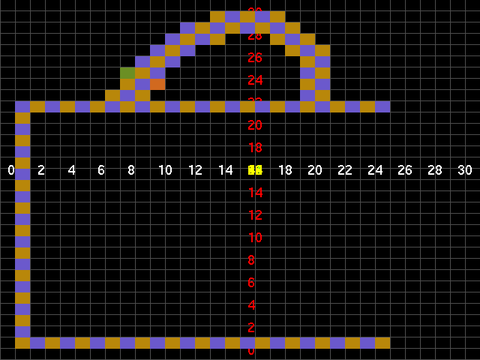
To better examine the correspondence between successive slices, press n to show the slices to a higher place and beneath the current slice (optionally t to make these slices transparent). The correct prototype shows a top view in orthographic projection.
To build the model in minecraft, I run minecraft and viewvox side-by-side then I can see where the blocks should go.
Obviously many improvements are possible, transport me your suggestions.
Some recent additions:
- evidence coordinate values in the image (press one)
- switch between orthographic and perspective projection (press p)
- look straight down the X, Y, or Z axis (press x, y, or z) (X, Y, or Z to look from the other side)
- store and restore settings (i.due east. when you start viewvox again with the aforementioned voxel model, information technology uses the same photographic camera and other settings)
- use keys to step camera (left, correct, etc.) i voxel at a time
- the filigree now has a cell for each voxel, and tin can be shown at the bottom or at the slice level (press g)
- both binvox and viewvox will prove the size of the area filled by the voxel model, and its bounding box (thanks to Eric Haines who submitted lawmaking for this). Yous can crop the voxel model by this bounding box (-fit commandline parameter)
- back up for writing .schematic files
- thick lines in the grid every 5 blocks
- unmarried piece view cycles through none-to a higher place-below-both
- single slice view in shows slice number
Notwithstanding on the to do list are:
- add option for 45 degree rotation
- show (10, y) coordinates on voxels
- bookmark and jump to photographic camera positions
- coloured meshes to convert to coloured voxels
- support for reading .3ds files, and for writing .vxl files
- centre a slice in the view
- ameliorate "trackball style" viewing
- show number of voxels in slice
- compile with freeglut instead of overabundance (to forestall mouse wheel crash)
- viewvox pick to write an image file for each slice
Exercise check out...
- the astonishing Mineways tool, which makes it easy to create 3D prints (!) of parts of your earth
- a Perl script for combining ii minecraft stats/achievements files
-
try my Calcudoku puzzle site,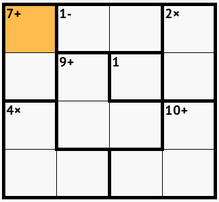 which likewise has Killer Sudoku and Sudoku puzzles
Any comments/suggestions are welcome at . Exercise send me screenshots of the models you take built!

Source: https://www.patrickmin.com/minecraft/
0 Response to "draw minecraft objects 3d planner"
Postar um comentário